絕對不是考試教學
有出現神奇問題重裝就對,重啟解決一堆詭異事情
最好還是會一些基本的指令會比較好
https://fanyue.ee/posts/LinuxBasic
1. 下載 ISO
記得先下載,教室網路超爛,你在教室才下載那應該不用玩了。
Ubuntu 24.04 For AMD64(Windows): https://mirror.twds.com.tw/ubuntu-releases/noble/ubuntu-24.04.1-live-server-amd64.iso
ARM 的在這裡(就 MacOS): https://cdimage.ubuntu.com/releases/24.04/release/ubuntu-24.04.1-live-server-arm64.iso
2. 指定 VM 的條件、 DISK、CPU、RAM、NET
-
打開你的 VirtalBox 按上面的那個新增

-
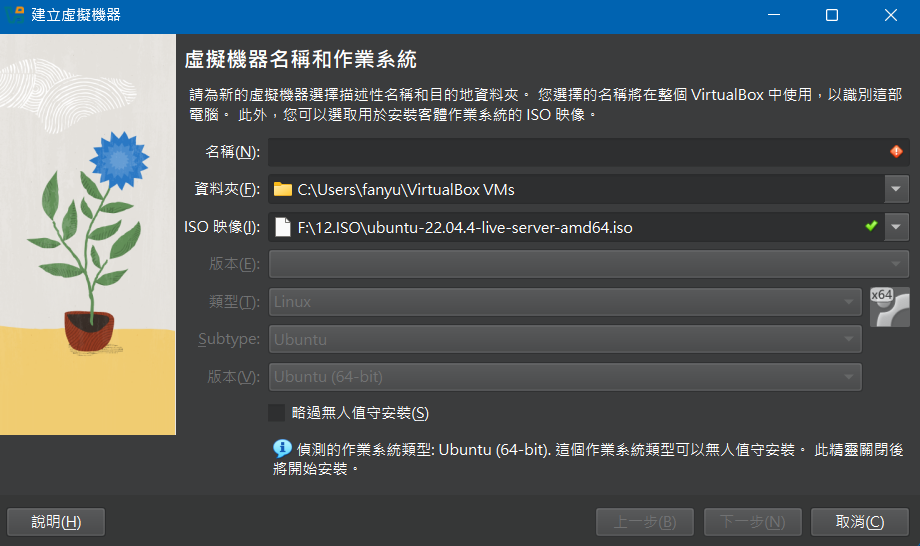
名稱自取 ISO 映像選下載的 Ubuntu.iso 那個檔案,略過無人值守的安裝打開(勾起來),選後點下一步
-
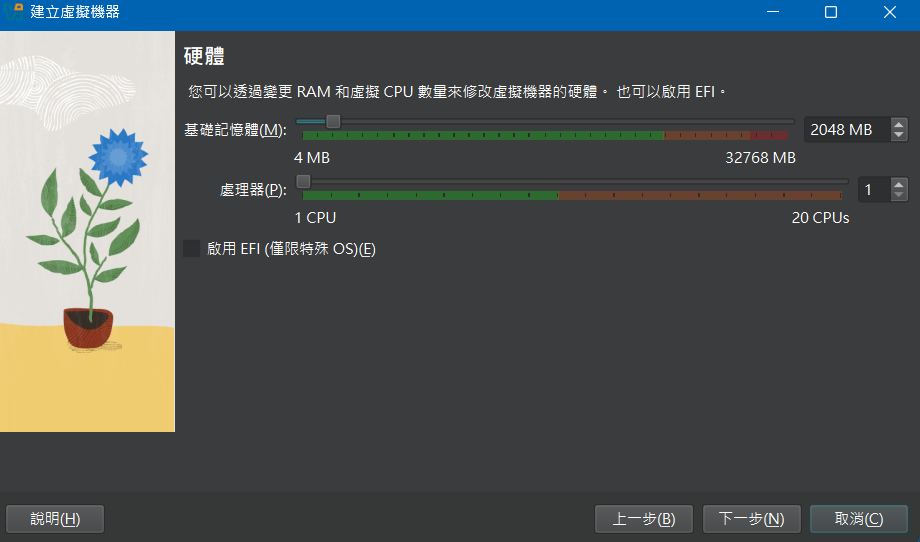
選硬體配置,自己拉
-
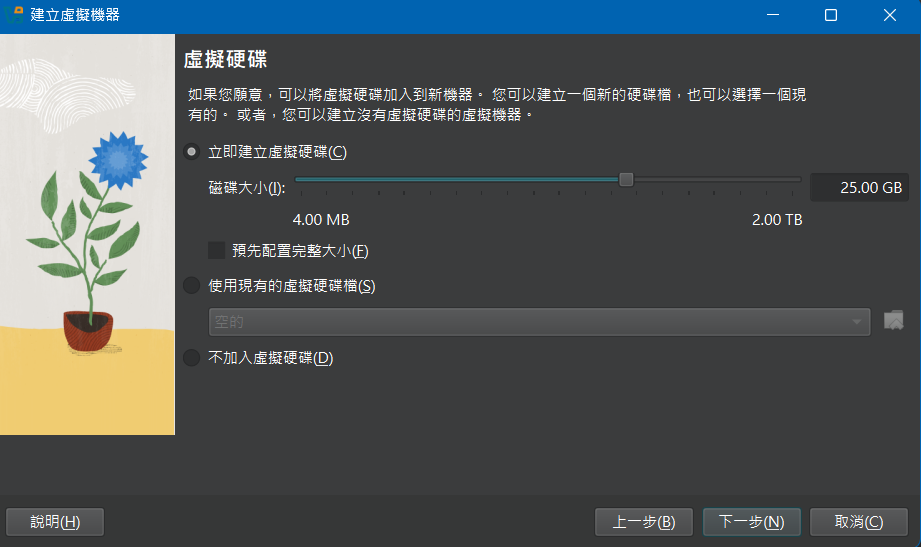
硬碟空間自己拉
-
就一直下一步然後完成
3. 重新給 IP
以下指令建議最好直接用 root 權限最沒問題, sudo su 讓目前改為 root 權限。
我猜是要我們設定 DHCP Host-Only?
設定位置
cd /etc/netplan
預設裡面應該會有 00 或 50 開頭的。
更改完 netplan 內的設定都需要打以下指令才會生效
netplan apply
DHCP
要拿 192 開頭的,網卡需要設置「橋接網路卡」
# This is the network config written by 'subiquity'
network:
  ethernets:
    enp0s3:
        dhcp4: true
  version: 2
固定 IP
要拿 192 開頭的,網卡需要設置「橋接網路卡」
network:
  ethernets:
    enp0s3: # 網卡名稱(根據狀況改)
      addresses:
      - 192.168.50.38/23 # 這裡要改
      nameservers:
        addresses:
        - 8.8.8.8
        search:
        - ntcu.edu.tw
      routes:
      - to: default
        via: 192.168.50.1
  version: 2
HostOnly
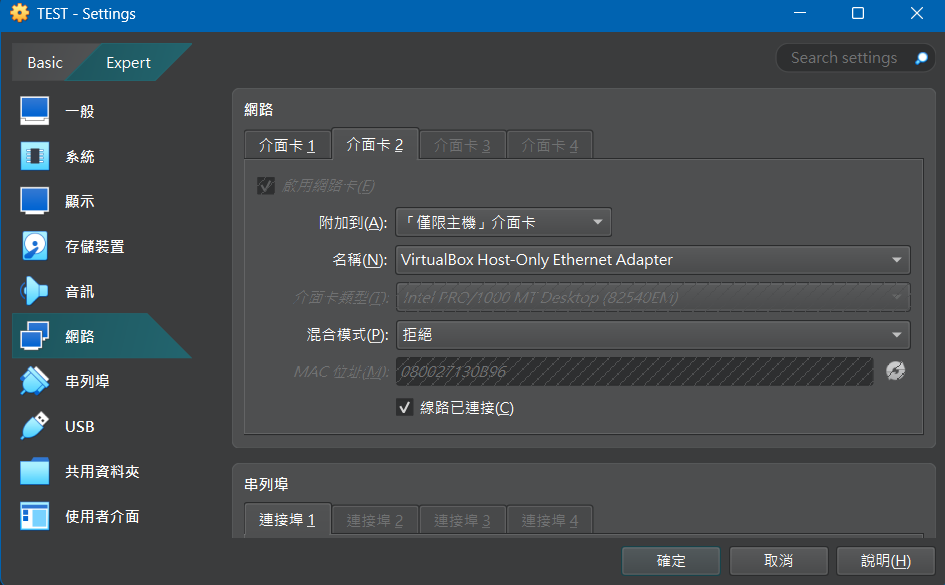
這裡以第二片網卡設置 HostOnly。
如何增加一片網卡
-
需要先關閉機器才能增加網卡,關機指令
shutdown now -
進設定
-
到網路,選介面卡2,選「「僅限主機」介面卡」
-
開機
-
查看網卡編號
sudo dmesg | grep eth
然後應該會出現
root@acs113112:/home/acs113112# dmesg | grep eth
[    2.697823] e1000 0000:00:03.0 eth0: (PCI:33MHz:32-bit) 08:00:27:55:9b:f0
[    2.697844] e1000 0000:00:03.0 eth0: Intel(R) PRO/1000 Network Connection
[    3.185485] e1000 0000:00:08.0 eth1: (PCI:33MHz:32-bit) 08:00:27:13:0b:96
[    3.185504] e1000 0000:00:08.0 eth1: Intel(R) PRO/1000 Network Connection
[    3.186500] e1000 0000:00:08.0 enp0s8: renamed from eth1
[    3.187957] e1000 0000:00:03.0 enp0s3: renamed from eth0
這裡可以看到 eth0 就是我們之前的第一片網卡,名稱為 enp0s3,第二片為 eth1 (就是依序下去) 名稱是 enp0s8。
創建一個新的 yaml 在 /etc/netplan,像是取個 1.yaml
# This is the network config written by 'subiquity'
network:
  ethernets:
    enp0s8: # 所以這裡要改 enp0s8 第二片網卡的名稱
        dhcp4: true
  version: 2
4. 設定時間 (+8)
timedatectl set-timezone "Asia/Taipei"
沒用的話打完重啟,reboot 這個指令是重啟機器
5. 設定 root 密碼。修改提示符號。
設定 root 密碼
sudo su獲得 root 權限passwd root設定 root 帳號的密碼- 編輯
vim /etc/ssh/sshd_config
PermitRootLogin prohibit-password # 找到這行

PermitRootLogin yes # 改成這樣
- 重啟 SSH 服務
systemctl restart sshd # 沒用的話打下面那一個
systemctl restart ssh
修改提示符號
查看目前的設定
echo $PS1

echo $PS2
如果只是要暫時顯示(重新連線就消失)
export PS1="自己打"
永久設定(重新連線後都在)
# 編輯設定檔
vim ~/.bashrc
# 找到
PS1="看你想要什麼"
儲存後打以下指令生效
source ~/.bashrc
參考參數
\d 日期
\A 時間,24小時
\@ 時間,12小時
\W 目前目錄
\w 完整路徑
\u 使用者名稱
\h 主機名稱
6. 建立使用者
adduser 使用者名稱
root@acs113112:/home/acs113112# adduser u001
Adding user `u001' ...
Adding new group `u001' (1001) ...
Adding new user `u001' (1001) with group `u001' ...
Creating home directory `/home/u001' ...
Copying files from `/etc/skel' ...
# 輸入密碼
New password:
# 再打一次
Retype new password:
passwd: password updated successfully
Changing the user information for u001
Enter the new value, or press ENTER for the default
# 這裡直接 Enter 下去
        Full Name []:
        Room Number []:
        Work Phone []:
        Home Phone []:
        Other []:
# 打 Y
Is the information correct? [Y/n] Y
7. 可以讓 root 直接 ssh 進入。
看第五點,第五點用完就能用了
8. 安裝, apache2、php 、samba
apt install apache2 php samba
9. 顯示網頁
這裡會比較亂,因為不知道怎麼分類
確認有頁面出來
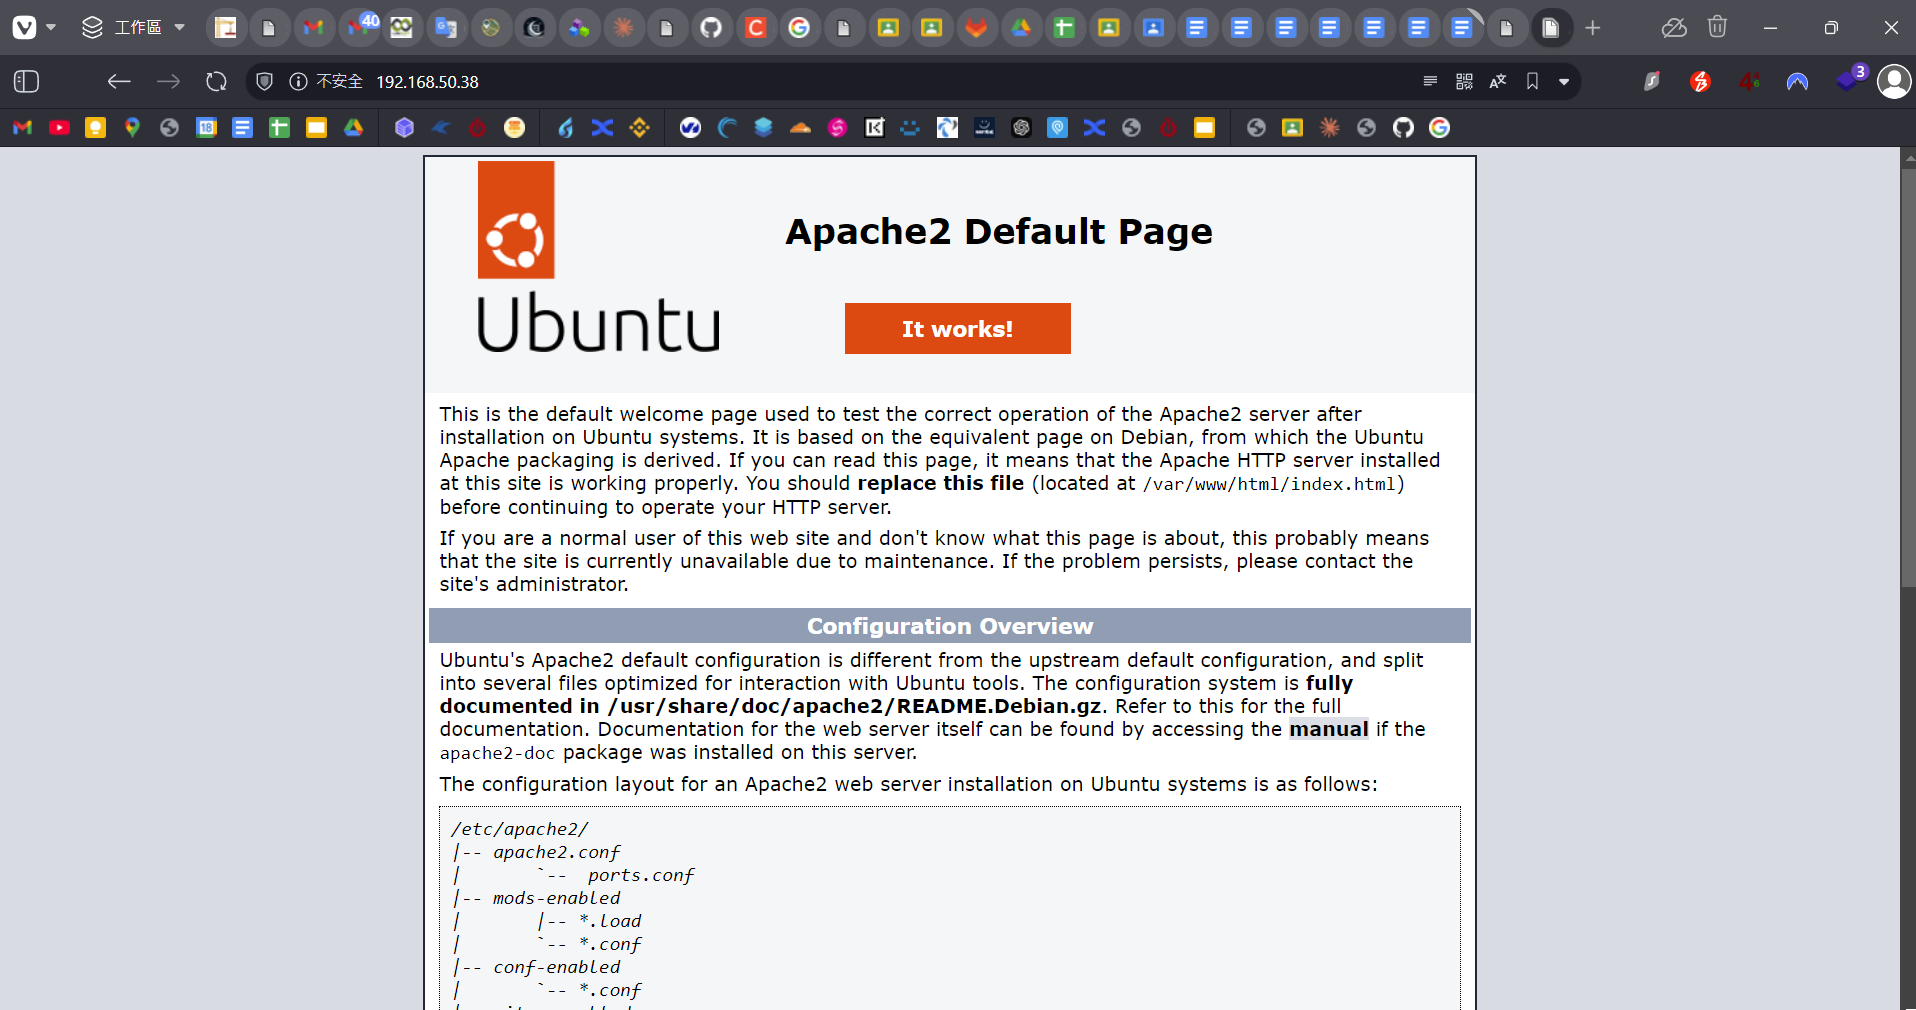
第八點,安裝完 apache2 瀏覽器打你的 IP 應該會出現以下畫面。
沒有的話啟動 apache2 systemctl start apache2
更改首頁
網頁的資料放在 /var/www/html 內
裡面的 index.html 就是剛剛看的頁面,可以改成 index.php index.html index.htm 這些都是預設頁面(也就是直接連線 IP 會出現的網頁頁面)
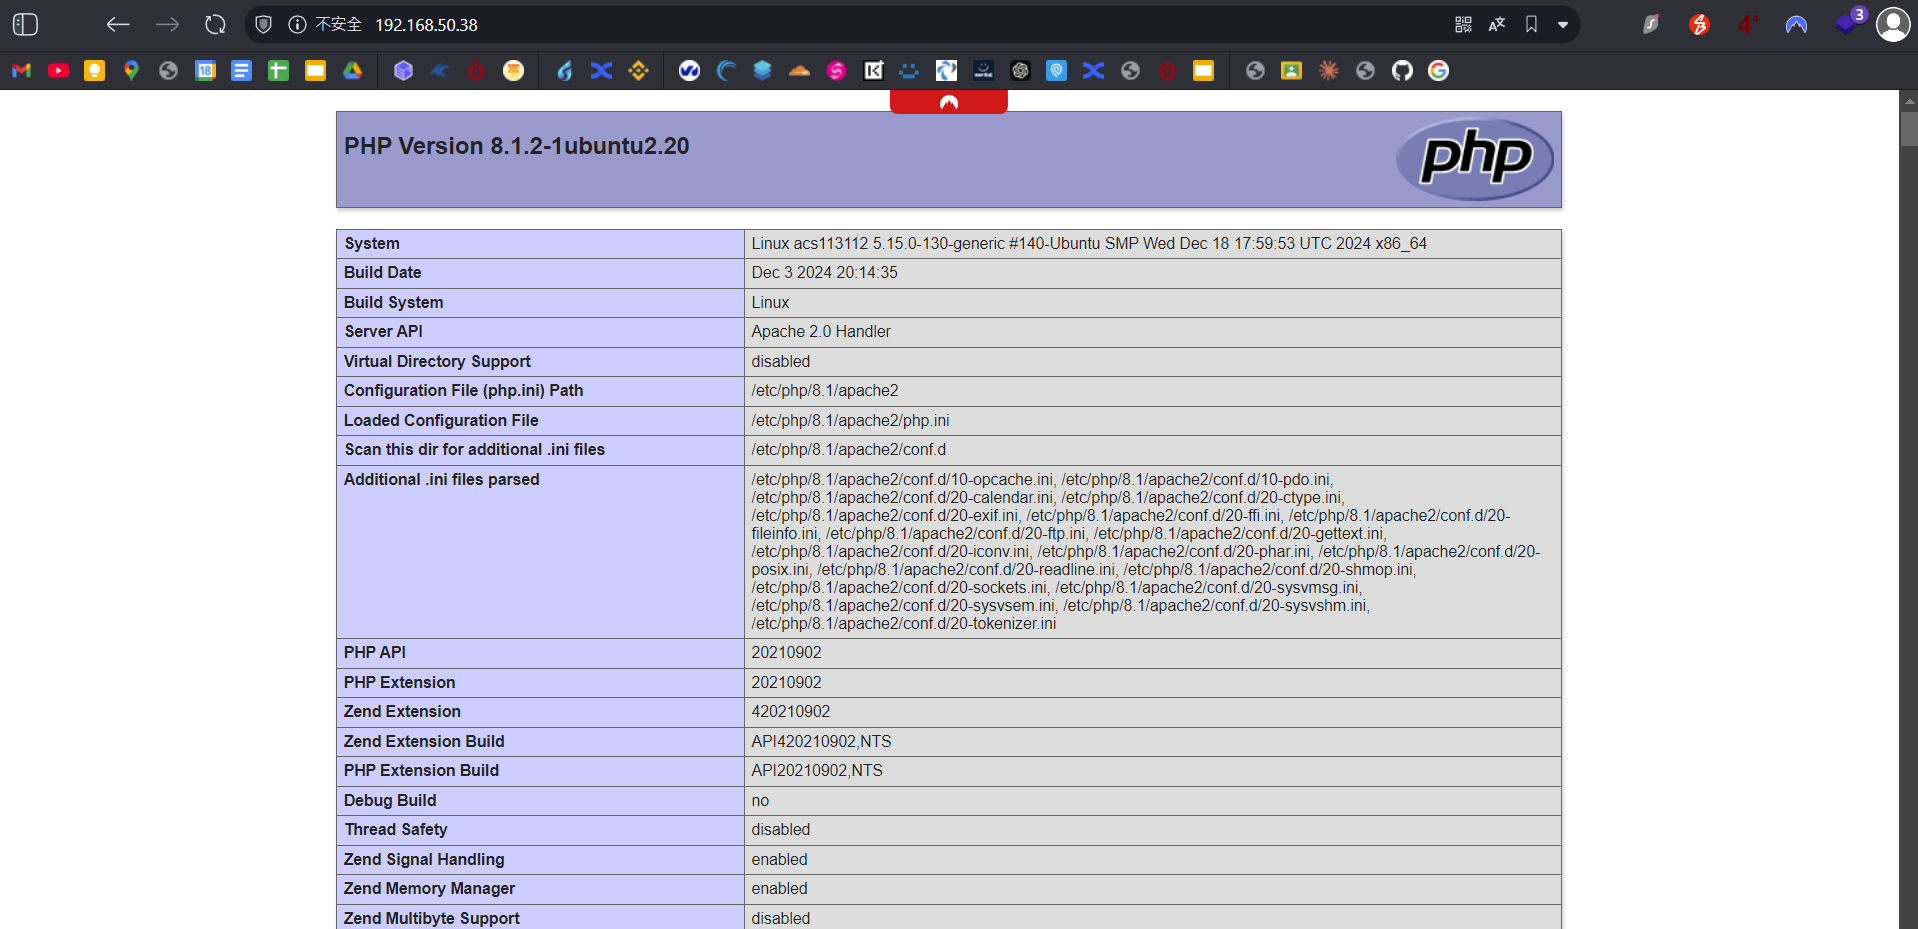
顯示 php 資訊
<?php
phpinfo();
?>
把這個丟進去 index.php 那就會顯示以下畫面
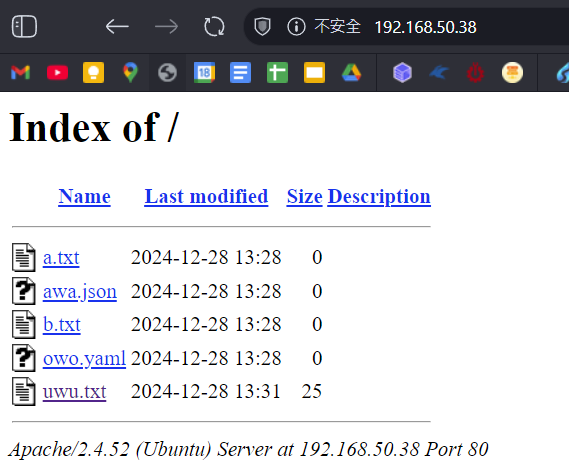
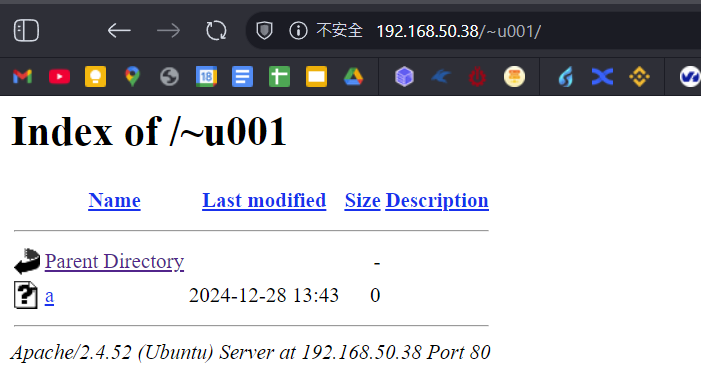
顯示資料夾內的文件
那就是不要留 index.php index.html 這類會覆蓋首頁的檔案
root@acs113112:/var/www/html# ll
total 8
drwxr-xr-x 2 root root 4096 Dec 28 13:28 ./
drwxr-xr-x 3 root root 4096 Dec 28 09:18 ../
-rw-r--r-- 1 root root    0 Dec 28 13:28 a.txt
-rw-r--r-- 1 root root    0 Dec 28 13:28 awa.json
-rw-r--r-- 1 root root    0 Dec 28 13:28 b.txt
-rw-r--r-- 1 root root    0 Dec 28 13:28 owo.yaml
-rw-r--r-- 1 root root    0 Dec 28 13:28 uwu.txt
那直接連線 IP 應該會出現以下畫面,就是 /var/www/html 內的所有檔案列表
個人的網頁功能
顧名思義每一個使用者都能創建一個網頁
- 啟用功能
a2enmod userdir
- 重啟 apache2
systemctl restart apache2
連線網址
http://你的IP/~帳號名稱(有那個~)現在直接連線應該會是 403 Forbidden 因為沒有權限
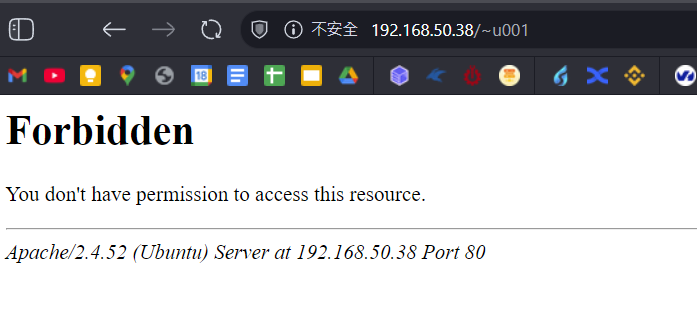
- 所以我們需要更改權限
cd /home
chmod 751 帳號名稱
# 進去資料夾
cd 帳號名稱
# 創建資料夾
mkdir public_html
# 網頁放這個資料夾內才會顯示喔
cd public_html
別名 Alias
vim /etc/apache2/mods-available/alias.conf
預設的設定檔案如下
<IfModule alias_module>
        # Aliases: Add here as many aliases as you need (with no limit). The format is
        # Alias fakename realname
        #
        # Note that if you include a trailing / on fakename then the server will
        # require it to be present in the URL.  So "/icons" isn't aliased in this
        # example, only "/icons/".  If the fakename is slash-terminated, then the
        # realname must also be slash terminated, and if the fakename omits the
        # trailing slash, the realname must also omit it.
        #
        # We include the /icons/ alias for FancyIndexed directory listings.  If
        # you do not use FancyIndexing, you may comment this out.

        Alias /icons/ "/usr/share/apache2/icons/"

        <Directory "/usr/share/apache2/icons">
                Options FollowSymlinks
                AllowOverride None
                Require all granted
        </Directory>
</IfModule>
現在改成這樣
# 別名名稱 打 /docs/ 那後面的 / 也要打,像是 https://192.168.2.2/docs/
# 別名名稱 打 /docs 那後面的 / 不一定要要打,像是 https://192.168.2.2/docs
        Alias /別名名稱/ "/對應的資料夾/"

        <Directory "/對應的資料夾">
                Options FollowSymlinks Indexes # 多加一個 Indexes
                AllowOverride None
                Require all granted
        </Directory>
        Alias /icons/ "/usr/share/apache2/icons/"

        <Directory "/usr/share/apache2/icons">
                Options FollowSymlinks Indexes
                AllowOverride None
                Require all granted
        </Directory>

        Alias /docs "/usr/share/doc/"
        <Directory "/usr/share/doc">
                Options FollowSymlinks Indexes
                AllowOverride None
                Require all granted
        </Directory>
更改完成後需要重啟 apache2
systemctl restart apache2
10. samba 應用
注意 Samba 的部分可能會因為下載的版本而有部分不同
本篇版本為 Version 4.15.13-Ubuntu 輸入
samba -V可確認本版本的重啟指令是 systemctl restrt smbd 而非 systemctl restrt smb 不能用就換一個試試看
建立使用者
pdbedit -a 使用者名稱
讓他 work?
進入設定檔案設定
vim /etc/samba/smb.conf
找到(我的在 175 行,善用 :set nu)
;[homes]
;   comment = Home Directories
;   browseable = no

# By default, the home directories are exported read-only. Change the
# next parameter to 'no' if you want to be able to write to them.
;   read only = yes
改成以下,記得去註解
[homes]
   comment = Home Directories
   browseable = no

# By default, the home directories are exported read-only. Change the
# next parameter to 'no' if you want to be able to write to them.
   read only = no
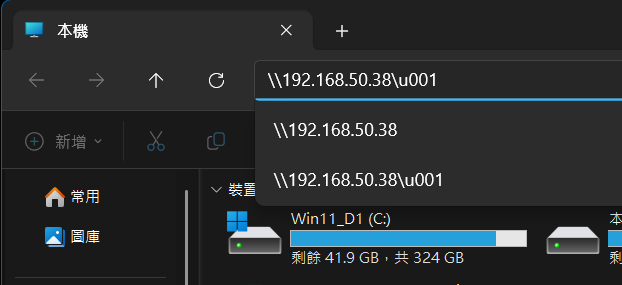
試著連線看看
- 打開你的我的電腦,輸入
\\IP記得是反斜線
我自己直接打會出現這樣
所以我加了 \使用者名稱 在後面就可以
-
這邊輸入帳號密碼,就是剛剛 pdbedit 的
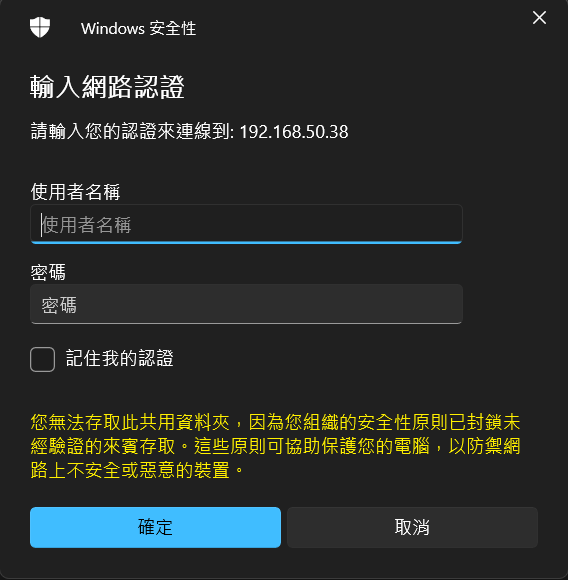
-
好欸,原神
-
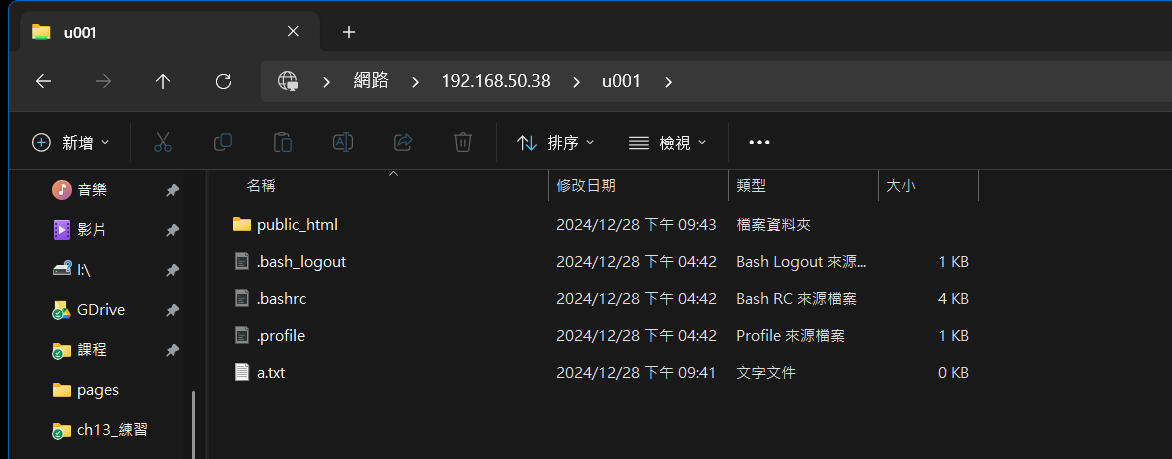
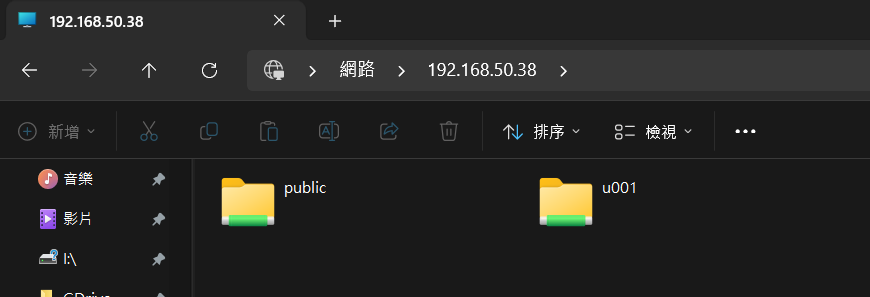
點上方的 192.168.50.38 就會到目錄\
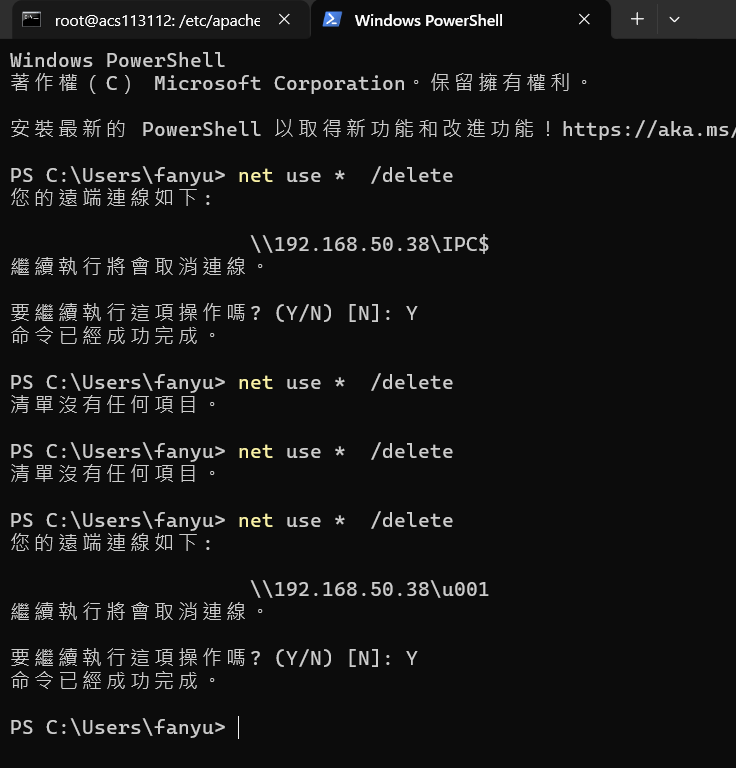
清除設定
在你的電腦終端機打,不是 Linux 內,是你的窗戶
net use * /delete
分享目錄
回到設定檔案
vim /etc/samba/smb.conf
檔案最下面增加
[public]
   comment = Public Stuff
   path = /home/samba # 這裡要改對應的目錄連結(這邊備註要刪除)
   public = yes
   writable = yes
   printable = no
   write list = @users
解釋一下
[public]  分享名稱
path  =   <分享的目錄>
write list = @users 可以寫入的帳號群組
重啟後就可以看到了
systemctl restart smbd
帳號群組
增加一個群組,剛剛的設定,群組名稱叫做 users
vim /etc/group
最下面加一個
users:x:100:使用者名稱1,使用者名稱2
然後儲存
回到 /home 資料夾
cd /home
輸入以下指令更改對應的資料夾所有權
# chown 更改權限群組版本的
# root:users 對應為 檔案擁有者:群組擁有者
# u001 就你要更改的資料夾
chown root:users u001/
然後再改一下權限
chmod 775 u001/
wget 很好用的工具
# 他就會從對應的連結下載東西
wget https://連結
# 可能常用的參數 -O 下載後把踏命名成什麼
wget -O uwu.zip http://連結
試試看
wget -O - https://fanyue.ee/cool.py | python3